


ROUND ROBIN AND OH THAT FOLIAGE
Before I get to the round robin, here's the close-up of the foliage in that woodland's quilt I showed you in the last post. Some of you asked how the bits of fabric were applied. It looks to me that however they were applied, they are behind a layer of netting, before the quilting was added. If you click on the picture, you can make it out.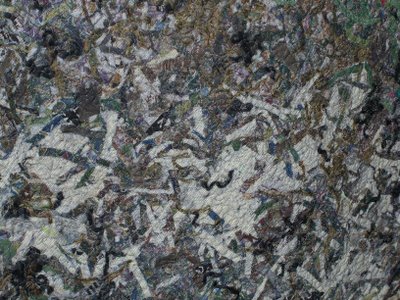


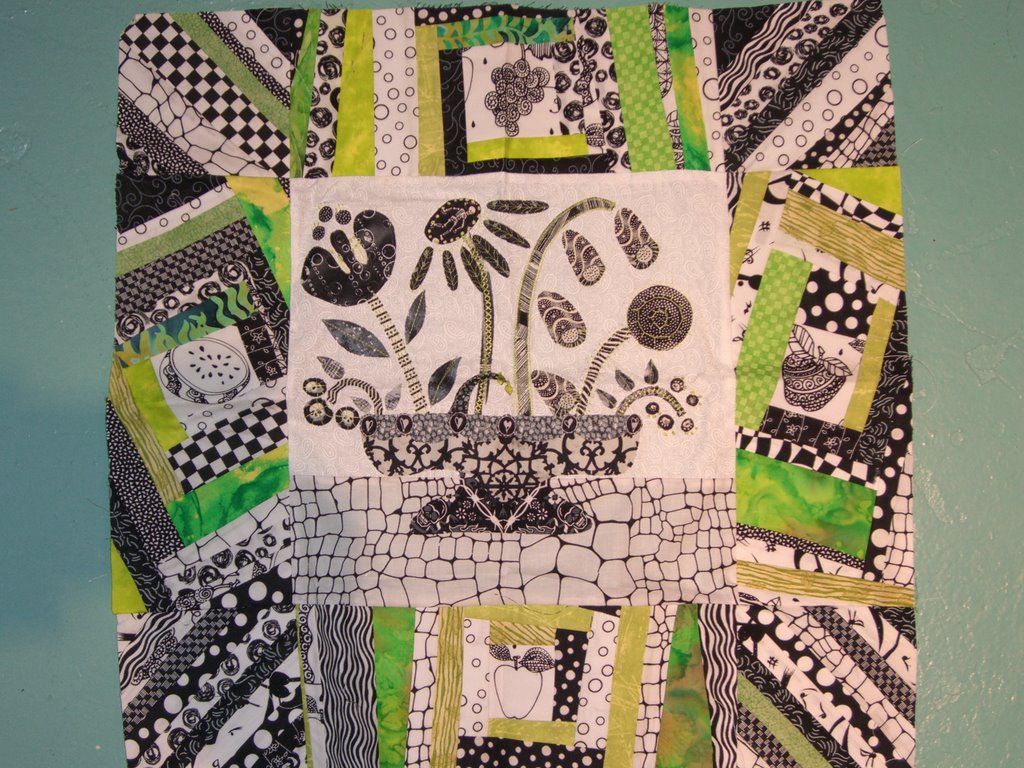
As you may recall, this round of the RR is "some form of circles." It took me a while to figure out what to do with it. Going to the quilt show helped alot. It's always good to get your artistic juices flowing with overstimulation of form and color. I came home and there was no stopping me. Here is the before, above. Unlike the last one, it came to me very busy and needed some calm, but also some unity with the original center block. So I started doodling on the nearest scrap of paper, and this is what I came up with (below). OK, now how to implement it? Do I use bias stems and form each corner - but then how do I transfer the design to fabric? If there is one thing I wish I could skip in quilting, it has to be transfering lines to fabric. I have yet to find a method that suits me. I decided that it would be much quicker and more precise to fuse pre-designed shapes in place. Before I began that process, I thought it would be a good idea to select and attach a border (below), and select the colors of the applique. Any black and white fabric would have worked against the calming effect I was looking for, so I chose a mottled grey fabric. Mmm, much better already.
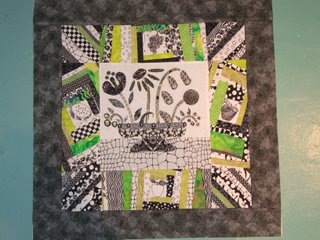 .. OK, I was happy with the scale of this, selected the applique fabrics, and enlarged the design on paper. Now all that's left to do is to trace the design onto the paper-backed fusible. After attaching to the reverse of this beautiful batik that I bought in Houston with the round robin in mind, I cut, peeled, and fused in place. It was great that I was able to cut all of the little circles out of the extra green batik that had fusible on it, as I was becoming very impatient with the length of time this one
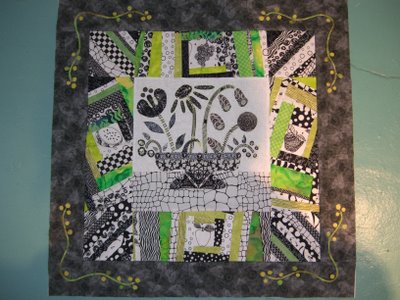
 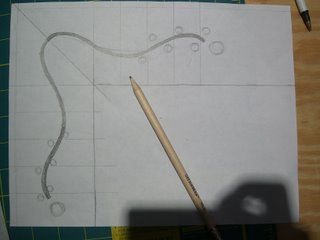 round was taking me. I suppose I shouldn't complain about that, because if I don't make myself have the patience then I shouldn't be quilting. Come to think of it, I tell myself that alot! If I'm boring you with my details I apologize, it's just that I find I enjoy blogs and quilters who aren't afraid to share their methods. Why should there be a mystery as to how something was done? I wish every quilt in Houston had these details attached! I was thrilled to see the evolution of "Rundy." It made me think that I could do that too someday. So if I can help someone feel less intimidated, by gosh I will! Following are my results...
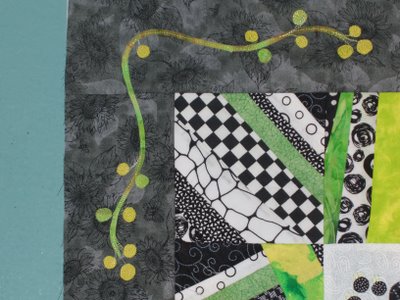

 So I started doodling on the nearest scrap of paper, and this is what I came up with (below). OK, now how to implement it? Do I use bias stems and form each corner - but then how do I transfer the design to fabric? If there is one thing I wish I could skip in quilting, it has to be transfering lines to fabric. I have yet to find a method that suits me. I decided that it would be much quicker and more precise to fuse pre-designed shapes in place. Before I began that process, I thought it would be a good idea to select and attach a border (below), and select the colors of the applique. Any black and white fabric would have worked against the calming effect I was looking for, so I chose a mottled grey fabric. Mmm, much better already.
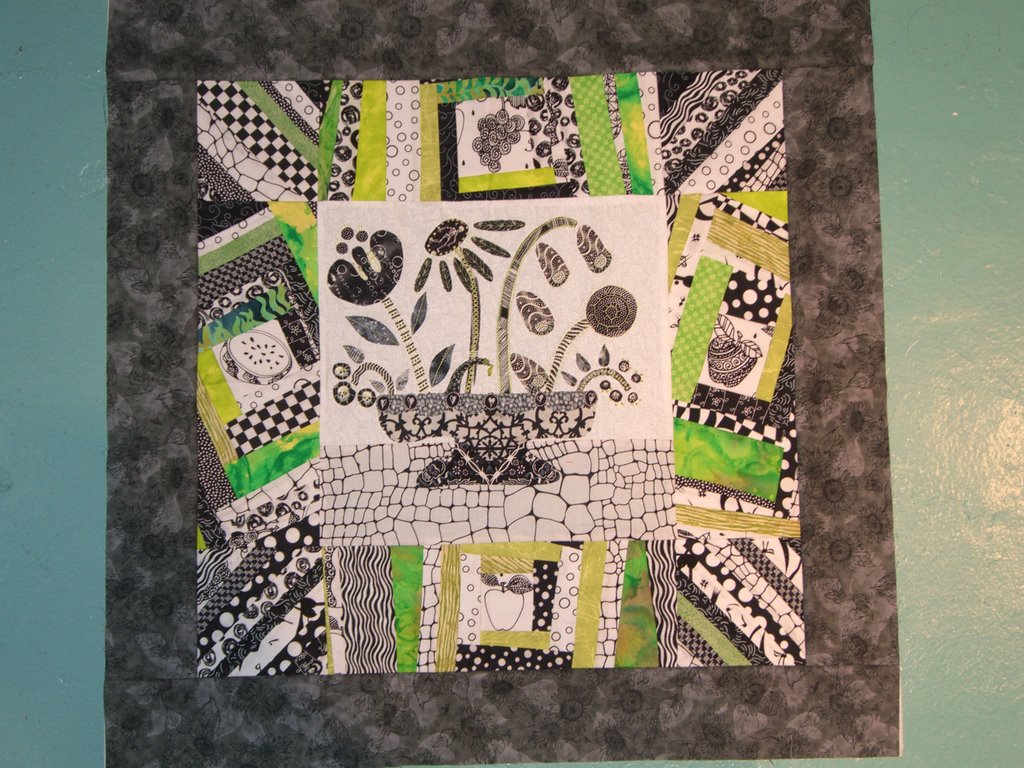 .. OK, I was happy with the scale of this, selected the applique fabrics, and enlarged the design on paper. Now all that's left to do is to trace the design onto the paper-backed fusible. After attaching to the reverse of this beautiful batik that I bought in Houston with the round robin in mind, I cut, peeled, and fused in place. It was great that I was able to cut all of the little circles out of the extra green batik that had fusible on it, as I was becoming very impatient with the length of time this one
 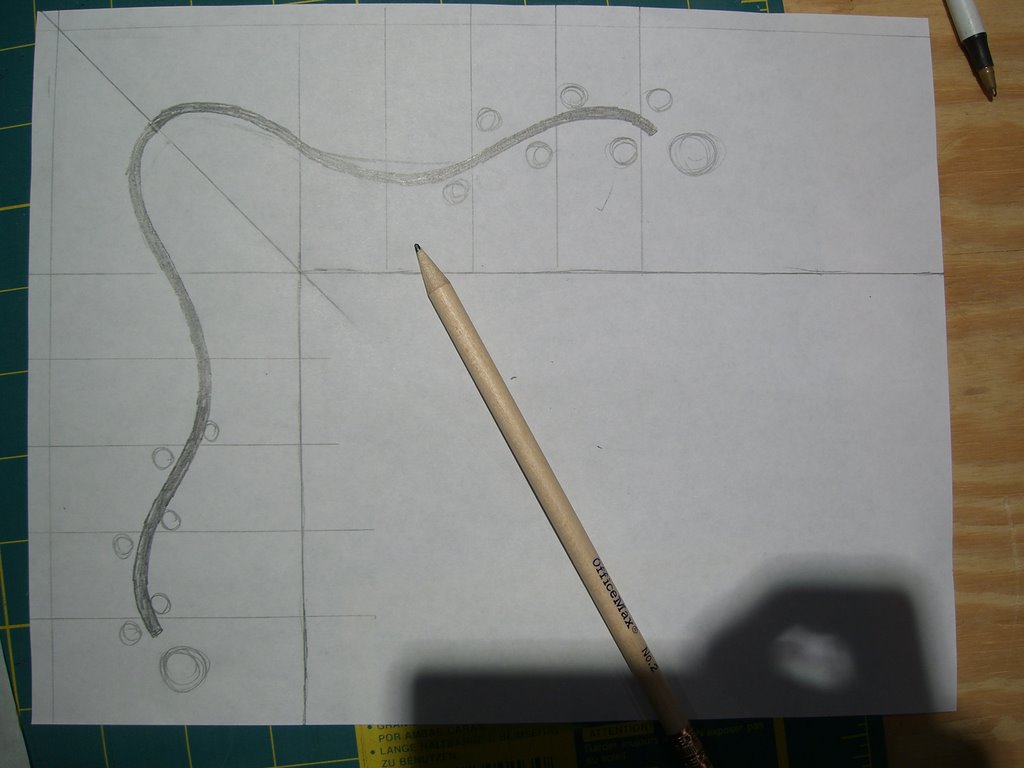 round was taking me. I suppose I shouldn't complain about that, because if I don't make myself have the patience then I shouldn't be quilting. Come to think of it, I tell myself that alot! If I'm boring you with my details I apologize, it's just that I find I enjoy blogs and quilters who aren't afraid to share their methods. Why should there be a mystery as to how something was done? I wish every quilt in Houston had these details attached! I was thrilled to see the evolution of "Rundy." It made me think that I could do that too someday. So if I can help someone feel less intimidated, by gosh I will! Following are my results...
posted by Miriam at 4:44 PM
![]()
![]()


8 Comments:
Miriam, you are truly an artist! Your work is exquisit. Thank you for sharing your detailed information about your work of art.
What beautiful work! You're so darn talented!
I watched a demo from the lady who made the foliage quilt at IQF this year. She puts down a base of the snippets, then tulle, and stitches that layer. Then, she puts more snippets for details, tulle, then stitches that layer to the first layer. The last layer is for the very fine details. She uses a darker shade of tulle for the underlayers. The whole quilt is built up layer by layer. Very beautiful--but best viewed from a distance for the effect.
Wow - great border! I really like it! Your work is lovely and I'm impressed with your creativity. I'm glad you got inspired from your trip to Houston!
That border is perfect, quiets it down to a dull roar!
Thanks, Miriam and Debra for more details on how those snippets of fabric were applied. I saw something like that in Quilting Arts a while back. It's definitely something I want to try.
Miriam, your round robin is amazing, love those fabrics together. Hooda thunk it!
Miriam, that border is terrific! I do round robins fairly often and I'll take inspiration from your process!
I am glad that you share your thought processes and details with us. Sometimes I think it is more interesting than the actual quilt itself. Since the thinking part is the part I like most about quilting itself. This is beautiful work. You set out to do exactly what it needed - calm it a bit, and unify the center. Great job!
P.s. Where did you see the details of the Rundy quilt? I would love to see the thought process behind that!
Post a Comment
<< Home